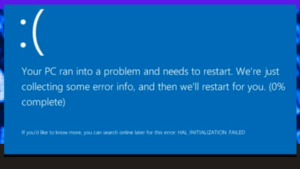
Suppose you are experiencing a DXGMMS2.Sys Bsod error, there are a few things you can do to try and fix the problem.
Make sure that all of your hardware is up to date. Then make sure that your system has the correct drivers installed.
Try running a scan for hardware issues. Fourth, check for any malware or malicious software on your computer. In this article, we discuss tips on How to Fix the DXGMMS2.Sys Bsod Error.
What is DXGMMS2.Sys Bsod Error?
DXGMMS2.Sys is a Blue Screen of Death (BSOD) error that can occur when your computer is experiencing problems with its DirectX graphics.
The error can be by various factors, including graphics card issues, corrupted files, and incompatible software if you see the DXGMMS2.Sys error message, try restarting your computer and checking for updates to your graphics card drivers. You may need to troubleshoot your hardware or software if the problem persists.
What Causes DXGMMS2.Sys Bsod Error?
Most blue screens of death are hardware problems, such as defective memory or hard drives. However, in some cases, a software problem can also cause a blue screen of death.
One such issue is related to the DirectX Graphics MMS2.sys file. This file is responsible for displaying graphics in games and other multimedia applications. If this file becomes corrupted or damaged, it can cause the blue screen of death error.
Here are some methods to solve the DXGMMS2.Sys Bsod Error:
- Reinstall Graphics Card Drivers
- Run Directx Diagnostic Tool
- Change the Tdrdelay Value in Registry
- Disable Hardware Acceleration
- Reset Bios Configuration
-
Reinstall Graphics Card Drivers
The DirectX Graphics MMS2.sys error, often caused by outdated graphics card drivers, can be solved by reinstalling the drivers. You can do this in a few simple steps:
- Open Device Manager by pressing Windows+X and selecting it from the menu.
- Expand the Display adapters section and right-click your graphics card.
- Click Update Driver Software and Search automatically for updated driver software.
- If you find no updates, you can try manually installing the latest drivers from your graphics card manufacturer’s website.
- Once you install the drivers, restart your computer to complete the process.
-
Run Directx Diagnostic Tool
The DirectX diagnostic tool can help determine if an issue is by DirectX and then help isolate the problem.
The DirectX diagnostic tool can help check for issues with Direct3D, DirectDraw, DirectInput, and DirectMusic. The DirectX diagnostic tool can also help verify that your video card and drivers are working correctly. To open the DirectX diagnostic tool:
- Press the Windows key + R to open the Run dialogue box.
- Type “dxdiag” and press Enter. The DirectX diagnostic tool will start and may take a few minutes to load.
- When it’s done loading, click on the “Display” tab.
- Under “Device”, make sure your video card is listed there. You may need to update your video card drivers if it’s not listed.

How Do I Fix the DXGMMS2.Sys Bsod Error? (Explained)
3. Change the Tdrdelay Value in Registry
Many users are getting the DXGMMS2.Sys BSOD error on their computers. It is a system file and is related to DirectX.
If you are also facing this problem, you can try changing the Tdrdelay value in the registry. It might help you to solve the problem.
You can access the registry by pressing Windows + R keys together and then typing Regedit in the Run dialogue box. Once you have opened the registry, go to the location. Here, you will see a DWORD value named Tdrdelay.
The default value of this DWORD is 8. You can try to change it to 10 or 12 and see if it helps you to solve the problem.
4. Disable Hardware Acceleration
Disable Hardware Acceleration is a method known to solve the DXGMMS2—Sys BSOD error. You can do this by going into your Graphics Properties and disabling acceleration.
Some users have also had success by disabling hardware acceleration in their browsers.
5. Reset Bios Configuration
Are you experiencing the DXGMMS2?Sys BSOD error? If so, don’t worry – there is a solution. One way to fix this issue is to reset your bios configuration. You can do this in several ways, but one of the easiest is using the F10 key.
When you hit this key, your computer will restart, and you will reset your bios settings to their defaults. It may solve the problem and allow you to continue using your computer without further issues.
How to Recover Data From the Computer With DXGMMS2.Sys Error?
When a computer system experiences a DXGMMS2 Sys error, accessing the data you store on the device cannot be easy. This article will provide instructions on recovering data from a computer with this error.
- The first step is to download and install a software program called Recuva.
- You can download the Recuva for free from the internet. You install the Recuva, open it and select the type of file you want to recover.
- Next, select the drive where your files are located and click “Scan.”
- The software will search through the industry for your lost files.
- When the scan is complete, you can select which files you want to recover and click “Recover.” You will save your files in a location of your choice.
Final Thoughts
In conclusion, you can do a few things to try and fix the DXGMMS2—Sys BSOD error. You can try updating your drivers, running a system scan, or checking your hardware for issues.
You can try reinstalling your operating system if those steps don’t work. If you’re still having problems, contact Microsoft for support.
Related Article:

